Adding Bluetooth audio to the DataFrog SF2000, a tale of cost-inefficiency.
I have to mention that I take no responsibility if your <$20 device gets fried by this guide.
Use it at your own risk
Caveats:
The SF2000 only outputs mono audio.
There is a noticable delay when sending Bluetooth Audio.
The volume wheel is very sensitive.
I experience some interference when the audio is very low. It's possible the grounds are in a good place or there needs to be shielding on some of the wires.
I noticed that this becomes more noticeable during emulation than in the menu.
Required parts:
KCX BT EMITTER
Tactile Momentary Buttons [used for pairing the module]
Mini Micro Slide Switch [used for switching between BT and speaker]
Double-sided tape (optional, but works well to hold the bluetooth module in place).
Small gauge wire (I used scrap wire pieces)
Note: At this point, these parts cost more than the SF2000 itself.
Required tools:
Small phillips screwdriver
Hot glue / gun.
Soldering iron
Utility knife or blade or side cutters
Dremel (optional)
I'll make the assumption you know how to disassemble the SF2000.
One note you might not find - the analog stick cannot be removed from the PCB, but it does fit through the hole. It is very tight!
With that said, let's take a look at the board:
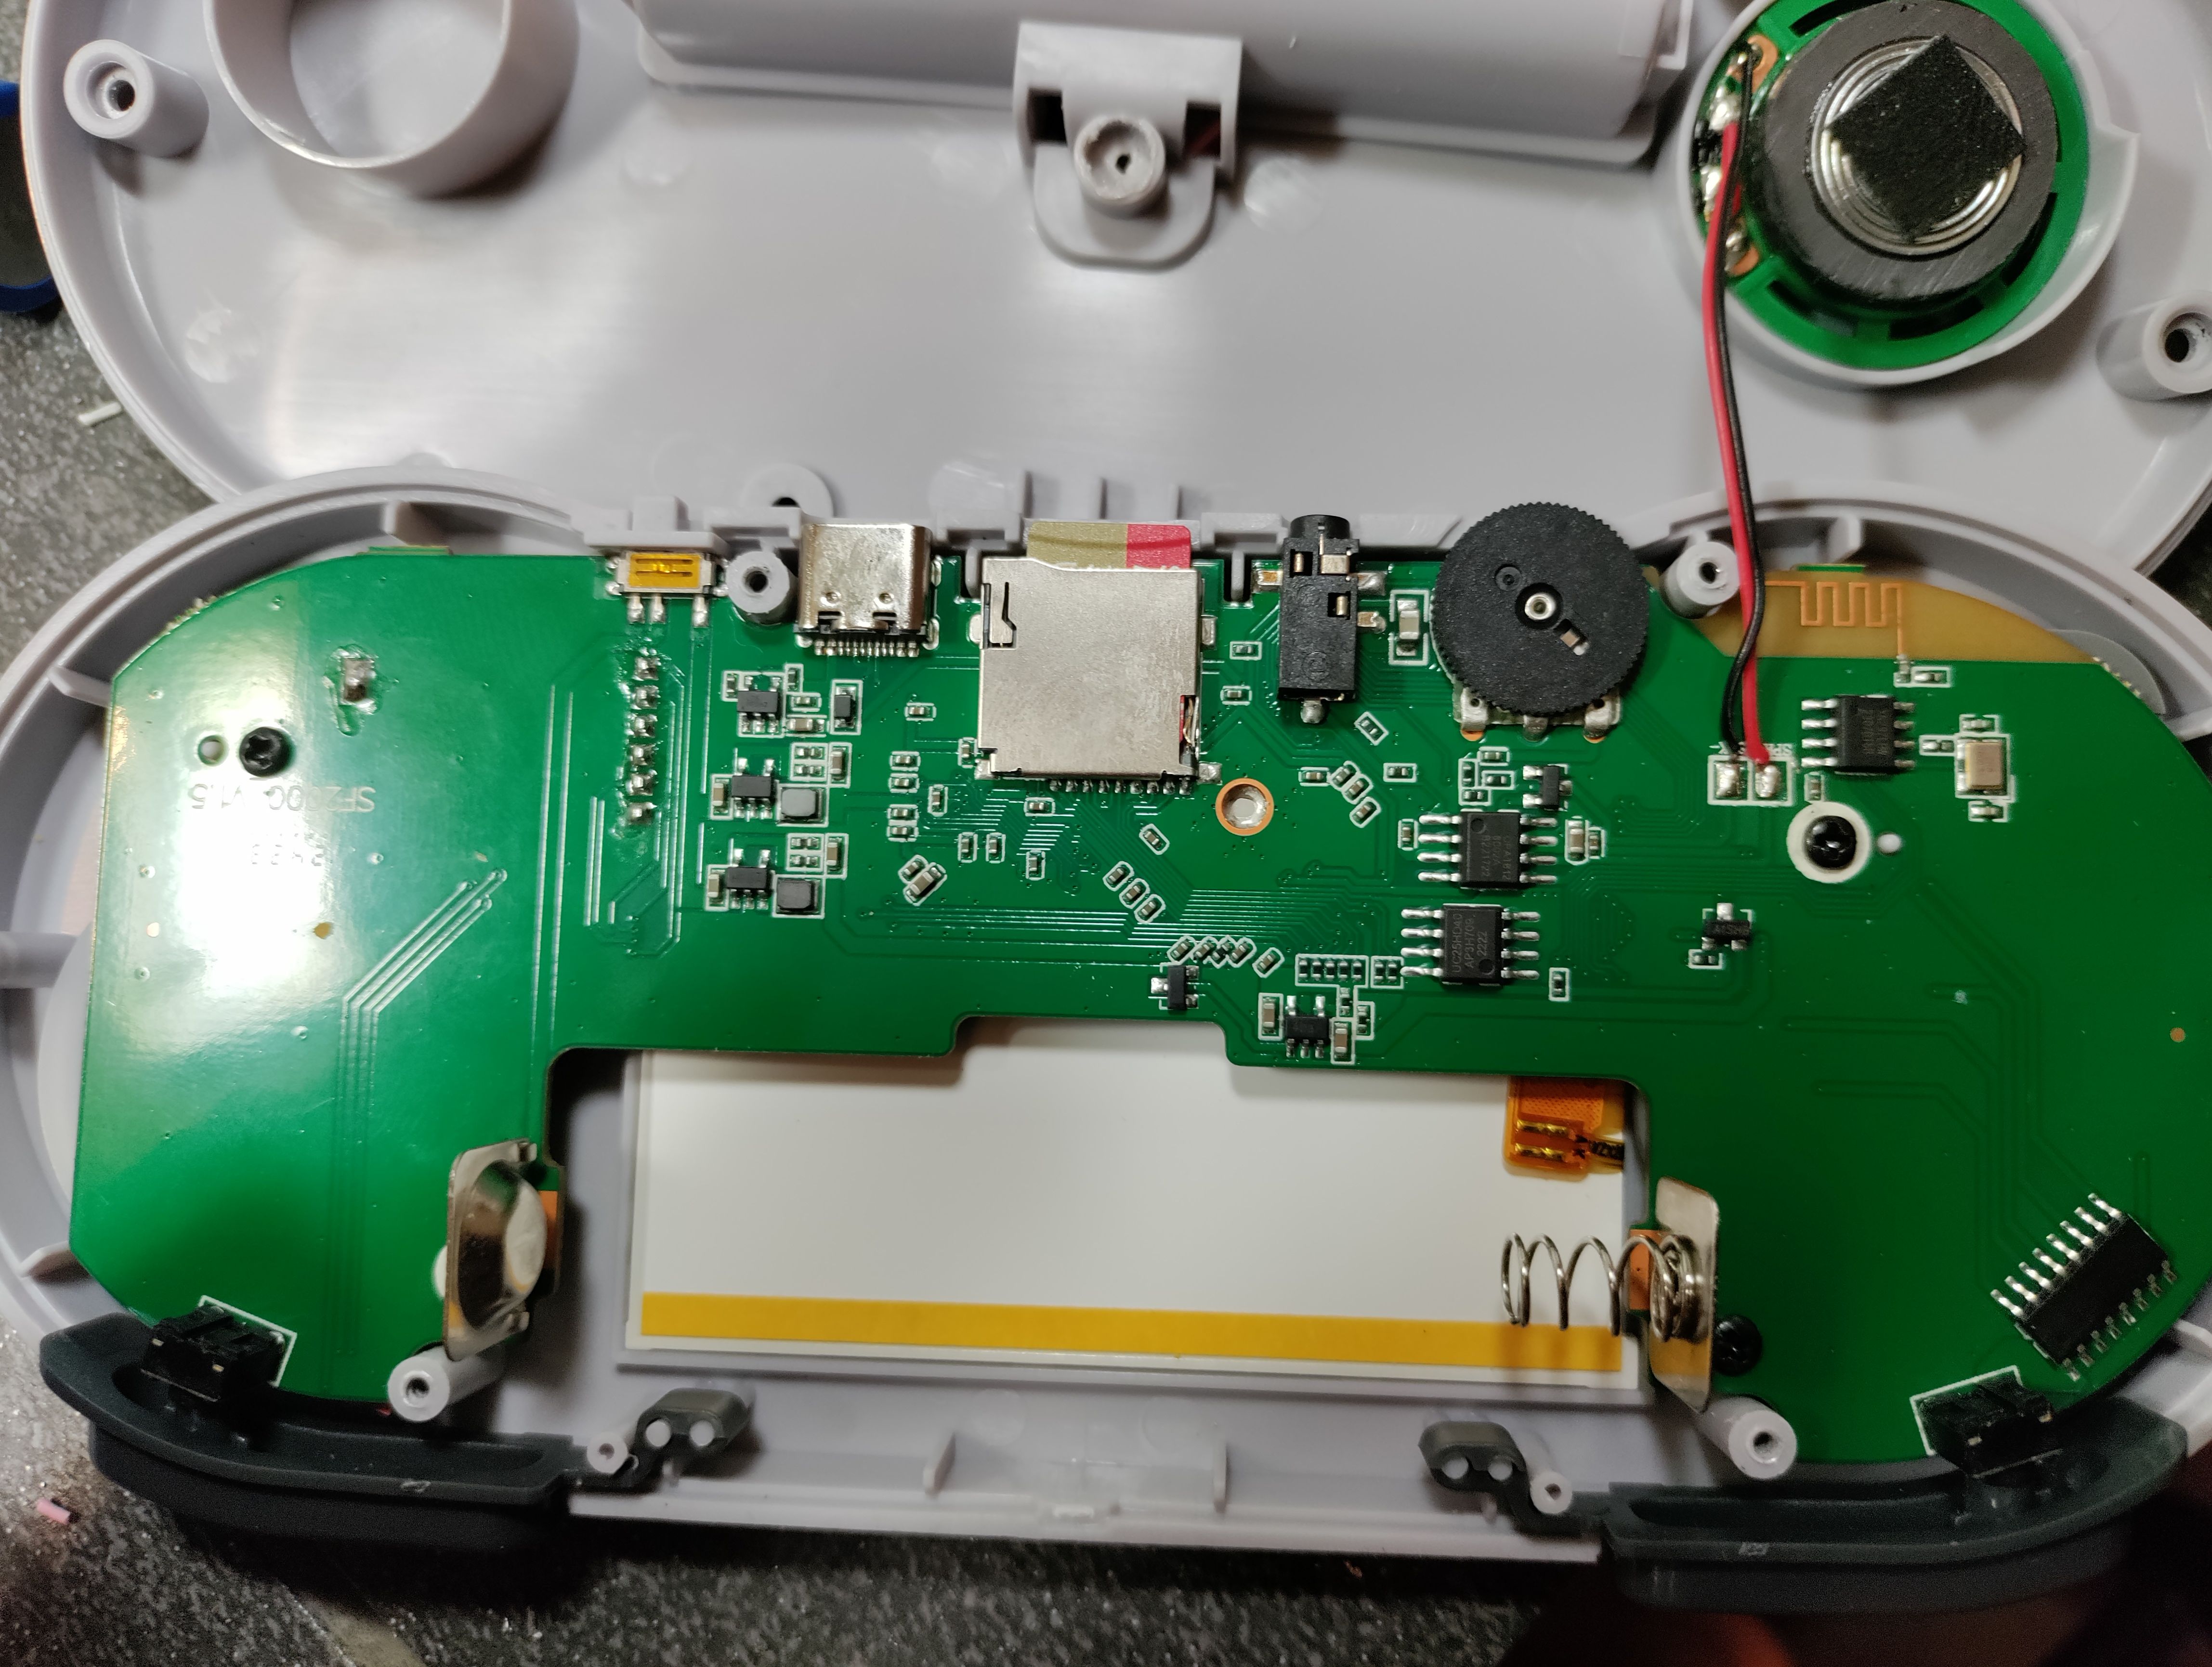
Here are the only solder points we care about on the board:

Next, let's prepare our Bluetooth module:
I've included a top and bottom shot [the bottom is labeled].
Notice that this module is TINY!
1. Bridge IN_L and IN_R, the output of the SF2000 is mono, so this ensures we get audio to both channels.
2. Connect the 5V to the 3.7V. This is within spect for this module
3. Connect the PGND (power ground) to the ground on the SF2000 PCB.
4. Connect the AGND (audio ground) to the same ground. [I'm not an electrical engineer, this might be terrible, I don't know!]
5. Connect a wire to CON and leave it disconnected. This will go to the momentary switch.
6. Connect a wire to the IN_L & IN_R bridge. This will connect to our selection switch.

Your Bluetooth module should look like this:
Note - there's an extra wire connected to the ground. Add this now. It will connect to the other side of the momentary switch.

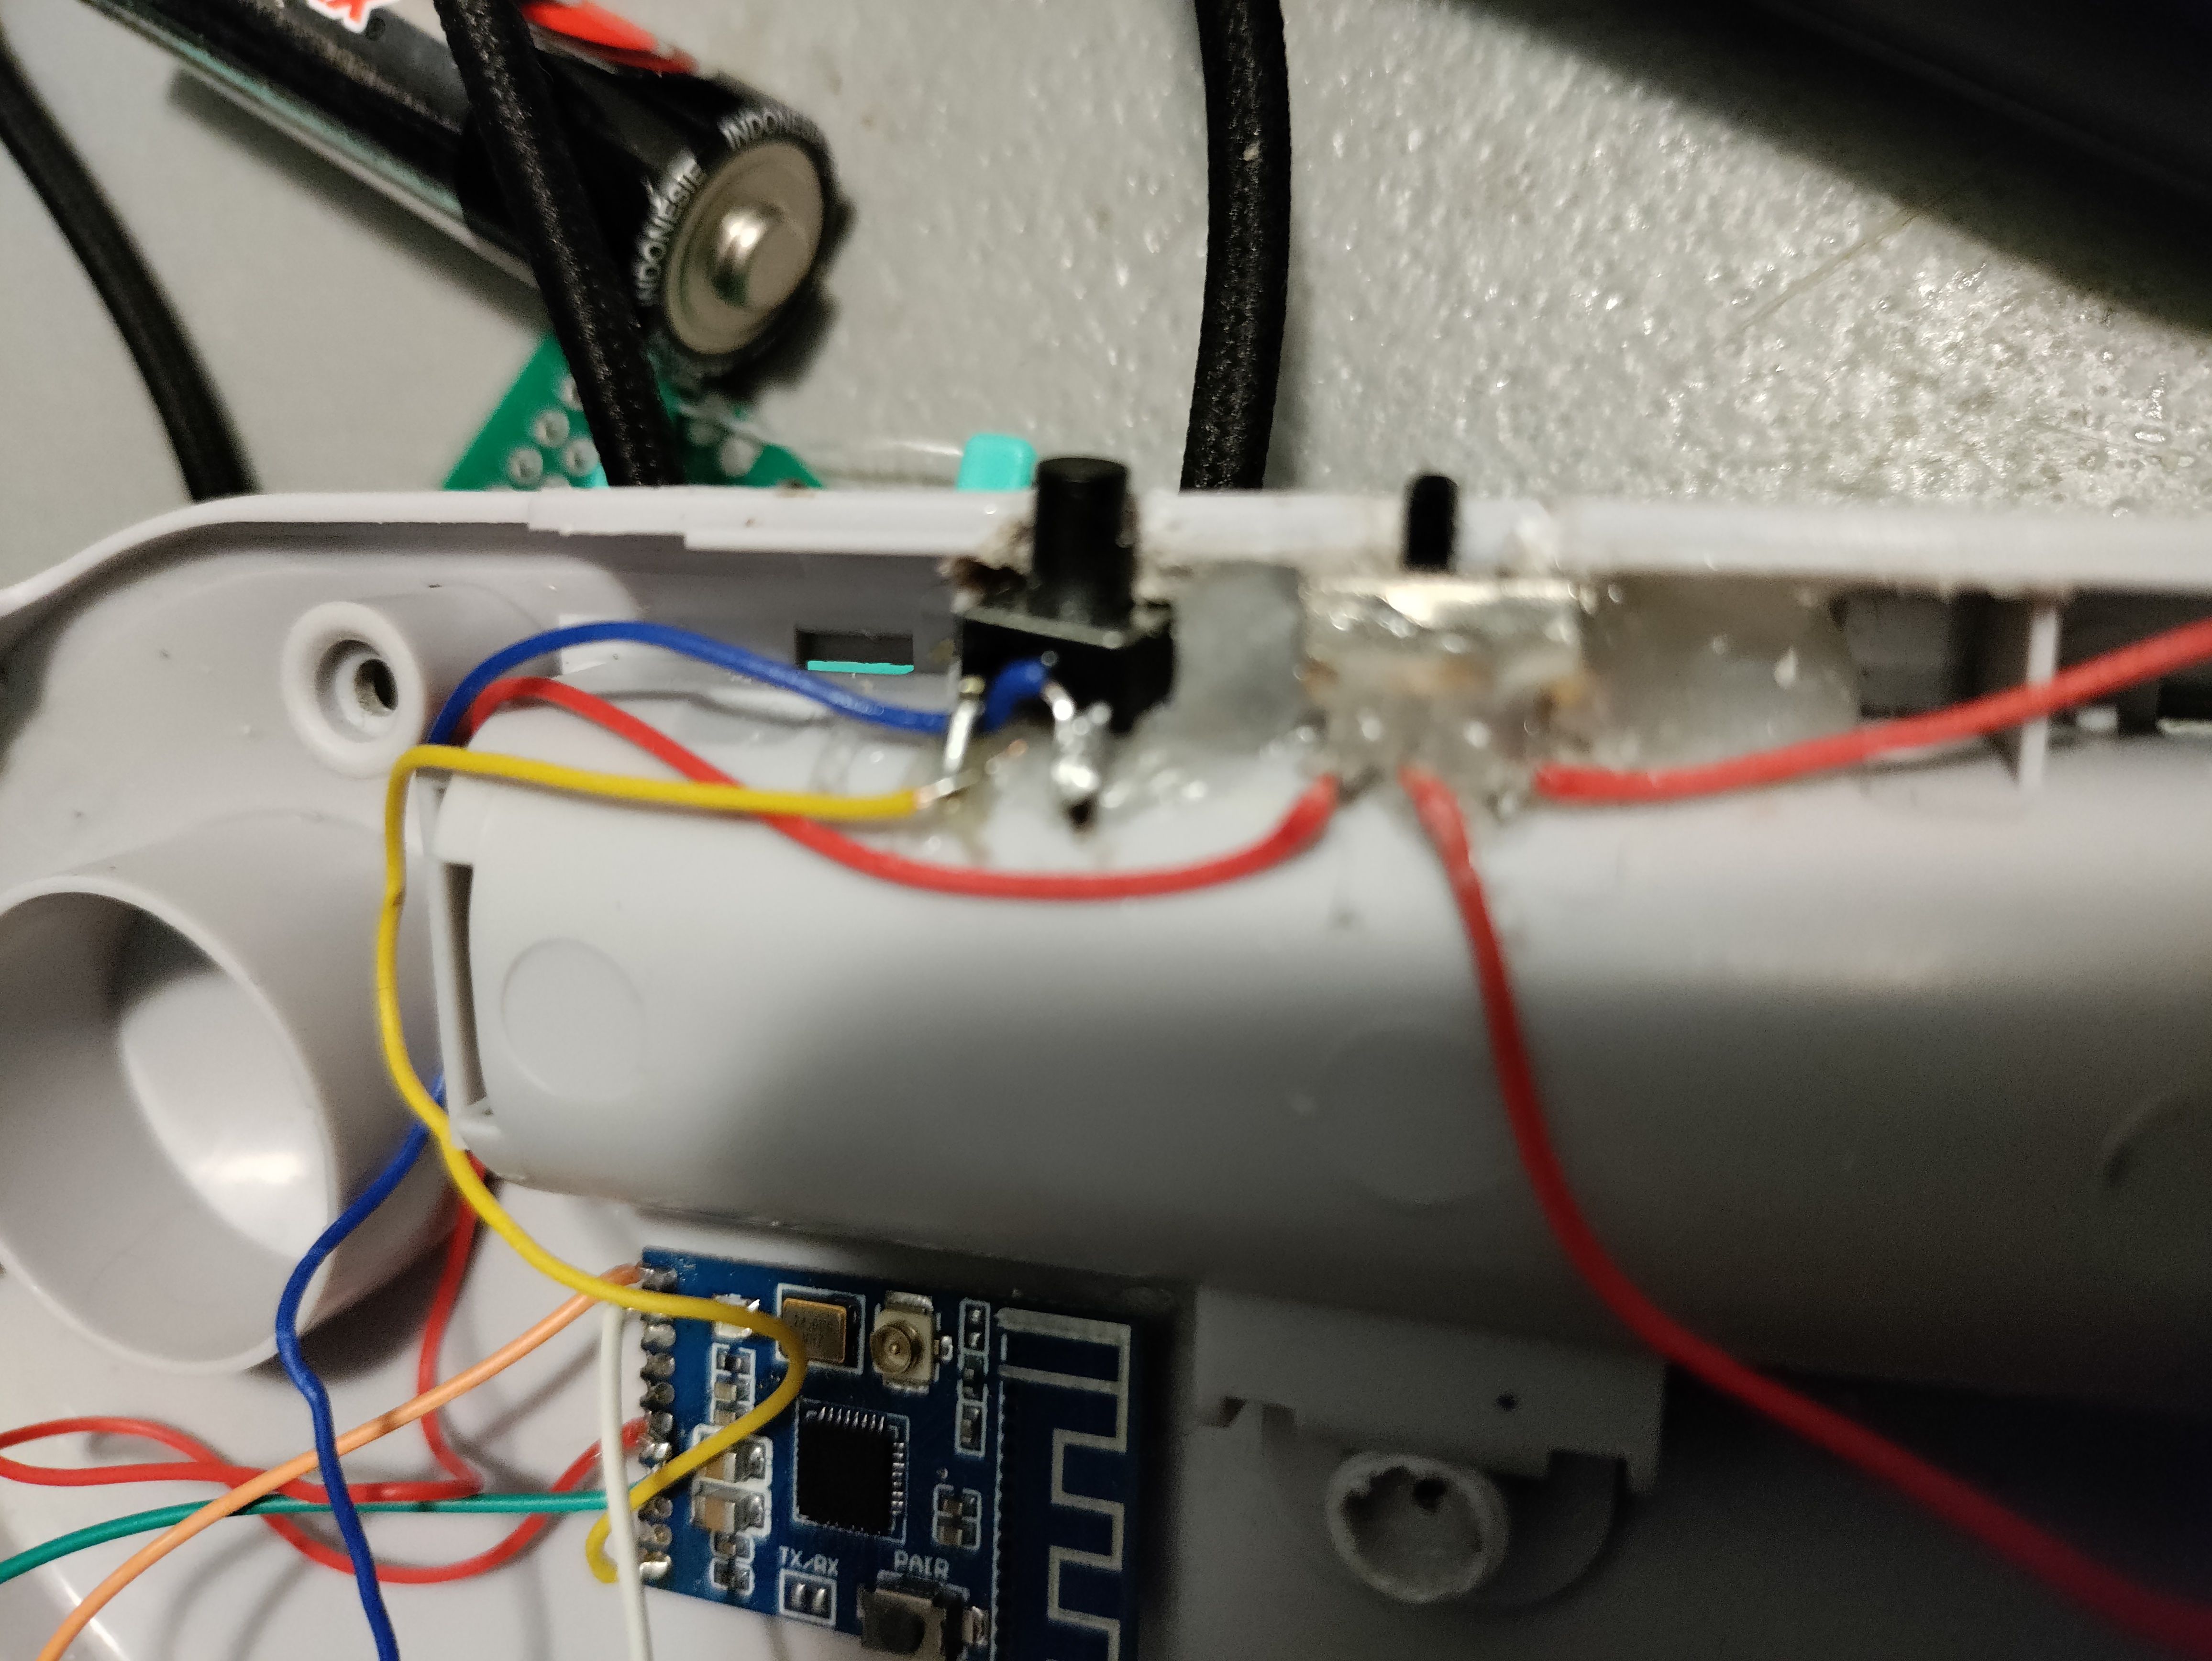
Next, let's add our buttons:
1. On the battery side of the case, top, center, there's a perfect spot to mount these.
2. Use a utility knife to trim back the case enough for the slide switch's switch to fit.
3. Disconnect the red (+) wire from the speaker and attach it to the center leg of the switch.
4. Connect the closest leg to the speaker.
5. Connect the other leg to the wire we already attached top IN_L & IN_R on the Bluetooth module
6. Bend the two unused legs on the momentary switch (I suggest he 7mm tall one) in, towards the module, or just cut them off.
7. Solder the CON wire from the bluetooth module to one leg, and the extra ground wire to the other.
8. Melt a hole in the case for your button (or use the cutters).
9. Use hot glue to secure your buttons (I did a terrible job of mounting the momentary switch).
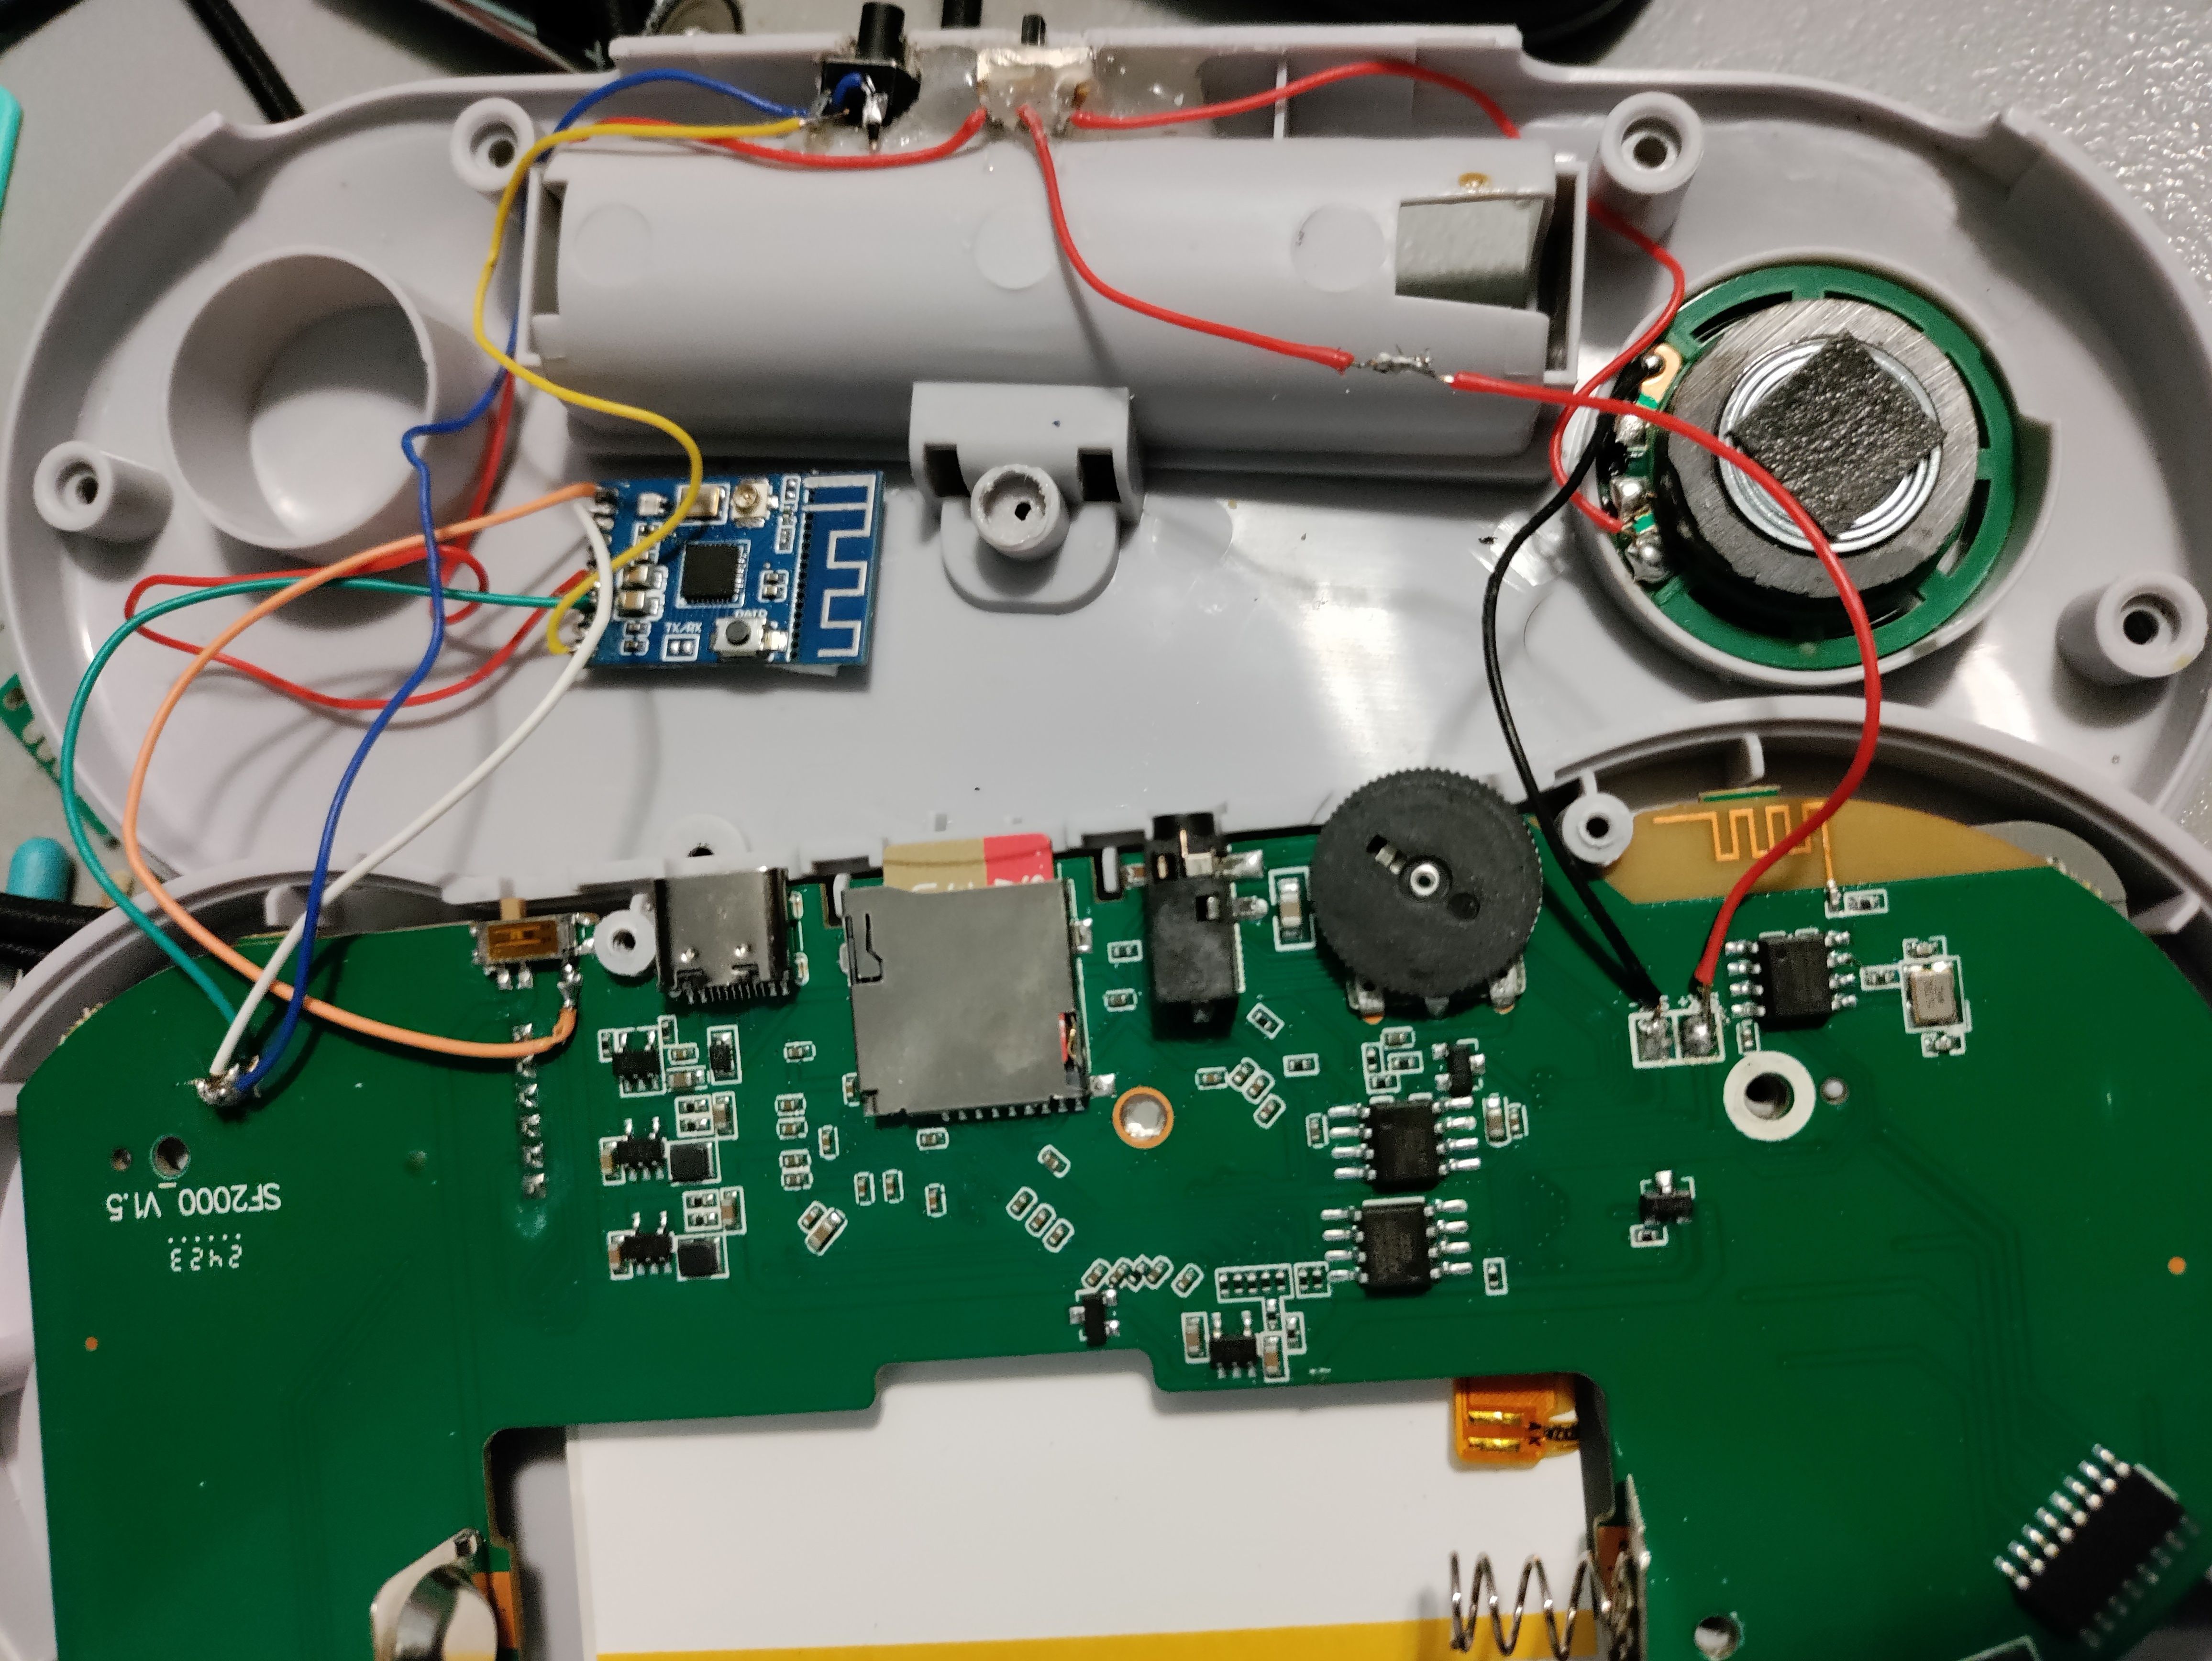
Adjust your buttons until they will move freely when you reinstall the case.
Be aware of your wire routing, a small amount of hot glue can be helpful to hold things in place. (My bodge on the red wire is a result of pinching a wire).
Next, you'll want to turn on your Bluetooth headset/earbuds, press and hold the momentary switch.
Make sure the slider is towards the Bluetooth side.
You should have Bluetooth audio!
If you have any questions, please feel free to shoot me a message on discord.
IQ_132
My patreon if you like this:
Patreon
My site if you want:
https://neo-source.com
sources:
YouTube video guide for adding bluetooth to the GBA
Information regarding the KCX BT Emitter